If you read the previous post, you might now be wondering, “So what in the heck do I use green chiles for anyway?” Any New Mexican would tell you, “Put ’em on anything!” This could be eggs, stew, burritos, hamburgers, pizza, Subway sandwiches, etc., etc., etc.
While this is all very true (especially the eggs part), you might be looking for something more concrete so I have decided to give you my Mom’s Queso recipe. Nothing reminds me more of my childhood than this appetizer. We had it for the big games (both tailgating at Texas Tech football games and for the Superbowl parties), celebrations (graduation, end of school, and birthdays), and family get togethers. The smell of green chilis always makes me think of my Mom’s Queso and all the happy memories associated with it.
NOTE: This was an honorable mention recipe at the 2010 Central Market Hatch Green Chile Cookoff and is a featured recipe on Tanji Patton’s website!
To get started, you will need the following ingredients:
- 3 roasted hot Hatch green chiles (5-6 if you wanna spice it up) NOTE: Do not attempt this recipe without roasted Hatch green chiles – it just won’t taste right
- Box of Velveeta (32 oz)
- 28oz can of Hunt’s diced tomatoes (the big can)
- 14.5oz can of Hunt’s stewed tomatoes (the little can)

First, defrost your Hatch green chiles. I will put them in the microwave on the defrost setting of 0.5 pound of meat and check them periodically. You definitely don’t want to heat them up so much that you fry them and don’t have any of the meat on the chile left.
While this is happening, you can begin cubing the Velveeta cheese. Chop them in cubes that are the same size that you see cheddar cheese served parties on toothpicks. (A side note, this revelation was recently made by one of my mom’s friends from her Clinical Lab Sciences class; we always cubed the cheese in large chunks and it took forever to heat up. The smaller the cube, the easier to melt!) Don’t neglect your chiles.
Take the green chiles out of the microwave and remove the black/charred skins from the chiles and throw into the trash (don’t flush down the sink as they might clog it up). Now you have a choice to make. From what I am told the hottest part of the chile is the vein and not the seeds (though they are admittedly hot as well). If you are afraid of how hot the concoction will be, go ahead and “de-vein” and “de-seed” your chiles before you dice them up and throw them in with the cheese.

Next up is to open the large can of diced tomatoes and put them in a colander and strain some of the juice out. My mom uses the whole can, but I always throw away a handful because I don’t want to risk my queso being soupy.
After that, put the stewed tomatoes in the colander and drain. Take out all the tomatoes and other vegetables, dice them up (I use all of these tomatoes) and throw them into the queso pot.
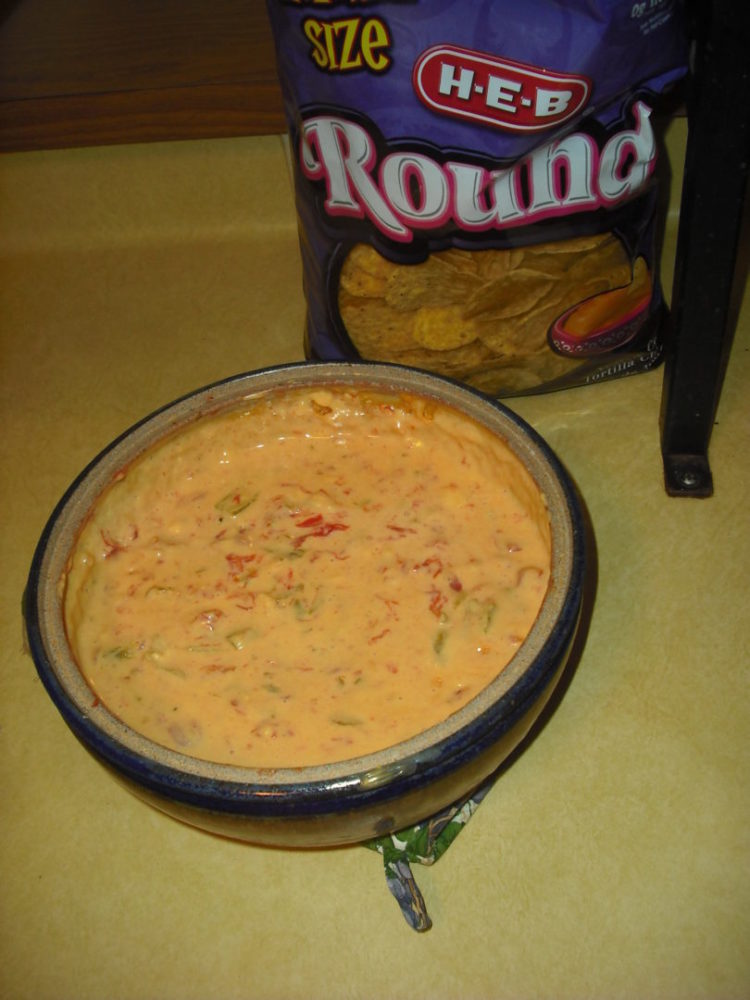
At this time, make sure your hands are washed and just give all the ingredients a good mixing. A note on the queso pot, I use a piece of pottery that was actually made in New Mexico. My mom had one, so I asked my grandparents for one for a present one Christmas because making my Mom’s Queso in anything else seemed strange.
Heat in the microwave for increments of three minutes and stir after the time is up; repeat this until the queso is smooth and all the cheese is melted. Trust me, don’t heat longer than three minutes at a time as you might scorch the queso! I know, I know, I am impatient as well, but queso 10 minutes later is better than getting scorched queso 10 minutes sooner.
If you leave the queso over night or refrigerate the leftovers, the heat from the chiles will increase; I really like it on the second day. I hope you enjoy this recipe as much as my paternal grandfather. He always tells my mom, “Thank goodness you married into this family otherwise I would have never had this queso!”

Sign up for the SA Flavor Newsletter for all the best of SA without the spam! And be sure to shop the SA Flavor Store for the best Fiesta Medals, stickers, shirts and more!